
As you already know, beans are an inexpensive source of protein, fiber, iron, vitamin B and C, and calcium.
Having jars of beans in your pantry makes it so much easier to include them in daily meals. Canned beans can be the basis for a quick, tasty meal.
So how to do bean canning? Is soaking necessary or can you do canning dry beans without soaking? That would definitely be the fastest and simplest method but should you skip soaking? We will talk right about it, keep reading.
IN THIS ARTICLE:
Do You Have to Soak Dry Beans Before Canning?
Yes, you MUST soak beans to rehydrate the beans before canning! Just remember that.
You may find other options around the web, but these aren’t tested and can be unsafe. Those other methods aren’t approved by USDA as safe methods.
So, What Will Happen If I Don’t Soak Beans Before Canning?
Beans need to be rehydrated in order to reach the proper temperature, otherwise, the heat may not kill all the bacteria that can cause food-borne illness. It can be caused by many different microbes and pathogens that can contaminate food. Some symptoms are diarrhea, and/or vomiting, abdominal cramps, nausea, fever, fatigue and others.
Proper canning practice (that includes soaking) destroys enzymes and prevents the growth of undesirable bacteria, yeasts and mold.

How To Do Bean Canning Without Soaking?
Although they shouldn’t, some people still do canning dry beans, with no cooking, and no soaking. It’s crucial to point out that it’s not a safe method. However, if you plan to store canned beans just for a short time so bacteria can’t spread so quickly, you can try the method with no soaking.
There is one important thing to note – dried beans can only be home-canned safely using a pressure canner! Any time you are preserving low-acid foods, and beans are like that, a pressure canner is required.
- In this method, dried beans need to be rinsed and placed into the jars.
- Then you need to pour hot water over the beans and close the lids.
- Place the jars in the pressure cooker and boil.
How To Store Dried (Unsoaked) Beans With No Canning?
When it comes to dried beans that you don’t have to soak, it’s one more method to store them. It’s not canning but has the same storing purpose as canning so it may be a good solution for you if you want to avoid soaking. So, if you want to store dried beans properly, you can vacuum-sealing them for the long term.
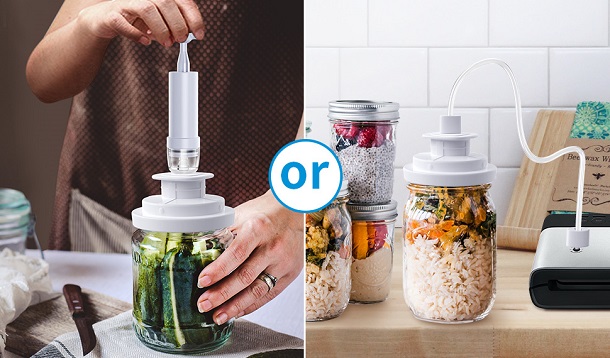
So, you need to have a Mason jar vacuum sealer and specially designed jars that feature a lid with an air valve. If you have a manual vacuum sealer, you need to pump the air. When you can’t pump anymore, then the jar is vacuum-sealed. If you have an automatic vacuum sealer then just turn it on, you don’t have to pump.
Then, How To Do Canning Safely?
Unlike the previous method that carries some risks, this one is completely safe. It includes soaking, then cooking, storing the beans in the jars and finally canning.
Steps to Canning Beans
- Prepare the Beans – Sort through the dried beans and pick out any damaged beans. Rinse the beans well and rehydrate them using one of these two methods – soak beans overnight or quick soak dried beans
- Prepare the Canning Equipment – Gather your canning gear, prepare the jars, set up the canner and organize your work area.
- After soaking with either method, drain off the soaking water, rinse your beans and place them in a large stockpot. Fill the pot with water to cover about 2’’ above the beans.
Bring the pot to boil over high heat and boil beans for 30 minutes. Then reduce heat to low to keep beans warm while you prepare to can them.
- Place jars filled with water in a pressure canner with a canning rack and filled the canner with 3’’ of water.Cover canner and boil jars for 10 minutes.
- Pack hot canning jars with partially cooked beans and cooking liquid. Now, you can add salt, but it’s optional.
- Add hot water to the jars to cover the hot beans, leaving a generous 1-inch headspace. Center lids on jar rims and tighten screw bands to just finger tight.
- Place the packed jars back into the canner.
- Allow the canner to come up to proper pressure for your altitude. Processing time for pints is 75 minutes and for quarts, it’s 90 minutes.
- Once processed, allows the canner to naturally come down to 0 pressure.
- Remove the jars and allow them to cool for 12-24 hours.
- Store sealed jars in a cool, dark place.

FAQ: Canning Beans
How Long Do Canned Beans Last?
General recommendations suggest eating home-canned beans within 1 year. Some guidelines suggest ban quality will be maintained for 18 months. After 12-18 months, the canned beans will start to degrade in quality, but they may be safe for much longer than that initial storage period.
Can You Can Beans In a Water Bath?
This is the most common question when it comes to canning beans and the answer is – No! It’s not safe to water bath can beans. Use a pressure canner, beans cannot safely be canned in any other method. The initial investment in a pressure canner is totally worth it.
Is Salt Required For Safe Canning?
Shortly, no, it’s not. Salt is optional as a flavoring and it’s not required. If you can beans without salt, you can add it to taste when preparing the recipe.
Do You Need To Sterilize Your Jars?
Because you’ll be pressure canning, no need to sterilize your jars, but make sure they are clean and always wash them right out of the box. Wash jars and lids in hot, soapy water and rinse well.

Why Canning Over Freezing?
There are a few reasons why canning is better:
- Saves your freezer space
- You don’t have to remember to take things out of the freezer so they have time to defrost
- In the case of a power outage, your canned beans are ready-to-go
Why Can, When You Can Buy?
Well, when comparing home-canned beans to commercially canned beans that you can find in any store, you’ll find that the home method is cheaper and healthier: dried beans are less expensive, can be prepared using less sodium and you don’t have to deal with that specific metallic taste.
According to some experts, purchasing dried beans is about 1/3 the cost of cans. Also, canned beans contain almost 100 times more sodium than dried beans. Plus there is the issue of the chemicals in the lining of the cans.
It’s great to have a supply of home-canned beans, it makes it easy to put together a real-food meal without spending 100 hours in the kitchen every day.
Environmental Benefits of Canning Beans
Buying dried beans in bulk and canning yourself can significantly cut down on the carbon emissions caused by food transportation of jarred and canned beans.
Buying pre-packaged and convenience food from grocery stores promotes the use of single-use containers, utensils, napkins and more that will end up in land fills and oceans.
To Wrap It Up
Canning beans at home is really easy and they are a shelf-stable pantry staple that can be stored for up to 18 months. Having an assortment of beans ready to go is a huge time saver. Some people want to save their time even more so they do canning with dried beans avoiding soaking but it’s not completly safe.